Mastering ShotKam Calibration: Essential Tips for European Shooters

Introduction to ShotKam Calibration
Calibrating your ShotKam reticle is essential for achieving precision, whether you're shooting game birds in the countryside or participating in a local clay pigeon shoot. This guide is tailored for European shooters, providing specific tips and tricks to ensure your ShotKam is perfectly aligned for your needs. To shop our ShotKam Europe online store, click here.
Reality vs. Perception: Why Calibration Matters
The ShotKam reveals the actual position of your gun muzzle, which might differ from what you perceive when aiming down the sights. Don't be surprised if your hold point seems on target, but the ShotKam video shows the reticle elsewhere. This is a difference between perception and reality, not a calibration issue. A laser bore sight can help confirm your alignment and achieve absolute certainty.
Your Step-by-Step ShotKam Calibration Guide
To get started with calibrating your ShotKam, follow these steps: First, download and install the free ShotKam app on your mobile device from the App Store (for Apple devices) or the Google Play Store (for Android devices).
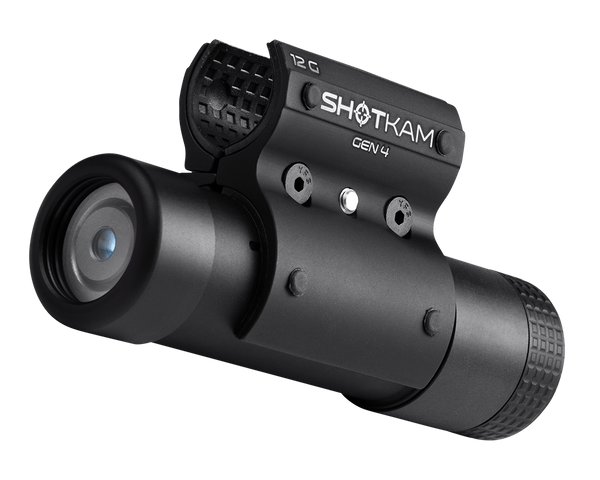
Next, attach the ShotKam 10-20 centimetres (or roughly 4 inches) back from the muzzle of your shotgun. This positioning ensures optimal alignment for most shooting scenarios in Europe. For a comprehensive guide, watch our calibration tutorial video.
After mounting, calibrate your ShotKam at a distance of over 30 metres. This ensures your alignment is optimal for various shooting distances. Use a laser bore sight or ask a seasoned shooter to double-check your alignment using the ShotKam app. Avoid calibrating while holding the gun to prevent inaccuracies.
Purchasing and Using a Laser Bore Sight
A laser bore sight is a helpful tool for ensuring accurate reticle calibration. You can find one for under €20 on Amazon or at most European gun retailers. Simply insert it into your shotgun barrel, activate the laser, and align the reticle to the laser point using the ShotKam app while aiming at a target over 30 metres away.
Understanding Lead and Shooting Ahead of the Target
Question 1: "Why is my reticle not directly on the target even though it broke?"
Understanding lead is essential. The reticle shows where your barrel was at the time of firing. When shooting at moving targets, the reticle will be ahead of the target, showcasing the correct lead you need for a successful hit. This is normal and expected. For more information on shooting techniques used in Europe, visit our Shooting Tips page.
Reticle Placement to the Side of the Target: Eye Dominance or Gun Fit?
Question 2: "In my videos, the gun barrel is always to the left of the target, even though I calibrated correctly."
This could be due to gun fit issues or complexities of eye dominance. If your videos consistently show the reticle left of the target, your eye's position during shooting might be different from during alignment. Consult a gun fitter or instructor for help. Learn more about eye dominance on our Eye Dominance blog or on our Help Center here.
Consistency in Calibration and Shooting
Question 3: "Do my beads need to be exactly the same when calibrating as when I'm shooting?"
Yes, maintain consistency in your bead alignment during calibration and shooting. Typically, most shooters use a "snowman" configuration. When using the "snowman" configuration for bead alignment, ensure that the middle bead of your shotgun forms the body of the snowman, while the bead above the muzzle forms the head. Align the reticle to the top of this "snowman's hat." This setup provides a clear and consistent point of reference, helping you maintain accuracy in your ShotKam videos. Refer to the image below for a visual guide.

Alternatively, if your gun fit has the beads in a flat line, where the middle bead is seen and hides the end bead, align the ShotKam reticle to the top of these merged beads. This consistency ensures your ShotKam videos accurately mirror your actual shotgun aim point. Learn more about trap shooting with ShotKam from our Trap Shooting Tips page.
Reticle Calibration at Varying Target Distances
Question 4: "I calibrated at 30+ metres, but it's off at 3 metres, why?"
This difference is due to parallax and the convergence point of your aim. The closer the target, the larger the apparent gap, but beyond 30 metres, the alignment is consistent, making this error negligible. Refer to the image below for a visual of this phenomenon.

Precision Rifle Calibration with ShotKam: Ensuring Zero-Point Alignment
To maximise accuracy when using the ShotKam on your precision rifle, it is imperative to calibrate the ShotKam's reticle to match the exact distance at which your riflescope is zeroed. Whether engaging targets at close range (30-40 metres) or reaching out to 100 metres or beyond, aligning the ShotKam's reticle to your scope's zero point is essential. This meticulous calibration eliminates any potential for reticle misalignment, which is especially pronounced at shorter distances. While reticle discrepancies may be minor (less than an inch) at 50 metres and become negligible at longer rifle ranges, aligning the scope and ShotKam's reticle at different distances (e.g., scope zeroed at 100 metres, ShotKam at 20 metres) can introduce significant aiming errors. Even when utilising the Moderator Mount, which positions the ShotKam 35 mm below the barrel, consistent alignment of both reticle systems at the same distance guarantees pinpoint accuracy and precise shot placement across all distances. This ensures your rifle and ShotKam work in perfect harmony for optimal performance. The Moderator Mount is available for €49 with free shipping.
Confirmation and Validation of Calibration
Question 5: "How can I confirm that I calibrated it correctly?"
Use a laser bore sight or have an experienced shooter verify alignment via the ShotKam app. Remember, the ShotKam depicts your gun's actual position, regardless of your perceived sight-picture.
Calibrating While Mounted to Shoulder
Question 6: "How can I calibrate my gun without setting it down?"
Calibrating your gun while holding it can complicate the process. For accurate calibration, set the gun down pointed at a target and use the ShotKam App to align the reticle with your point-of-aim. Holding the gun can lead to inaccuracies due to inconsistent shouldering and eye positioning. For the best results, place the gun in a stationary position and align the reticle to the rib of your gun. If you prefer to hold the gun, use the manual record feature in the app by creating a short recording with the "Test Recording" button, then replay the video to make gradual reticle adjustments. However, this method is less ideal, as it might deviate from the gun's actual aim point. The goal is to align with the barrel, not just your sight-picture. Keep calibration straightforward, and if discrepancies arise, the issue likely stems from how the gun is held during shooting. The ShotKam depicts the gun's actual movement, highlighting differences from your perceived actions. For a full overview, please refer to our Help Center article here.
Conclusion
In conclusion, understanding and mastering reticle calibration is essential for accurate shot analysis and improved shooting performance. By following the steps outlined in this guide, you can achieve precise alignment and uncover the true point of aim for your shotgun. Remember to avoid unnecessary complexities and adhere to our calibration guidelines. If you encounter discrepancies in your ShotKam videos, it’s likely due to how the gun is held during shooting rather than a calibration issue. Embrace the insight that the ShotKam provides, as it reveals the actual motion of your gun, which may differ from your perception. This knowledge can help refine your technique and enhance your shooting accuracy. For the best results, use tools like a laser bore sight and ensure consistent reticle alignment across varying distances. Whether calibrating at 30 metres or using the ShotKam on a precision rifle, proper calibration ensures optimal performance and accuracy.
Ready to upgrade your shooting game? Click here to learn more or buy the ShotKam Gen 3 and Gen 4 today.
You are reading:


